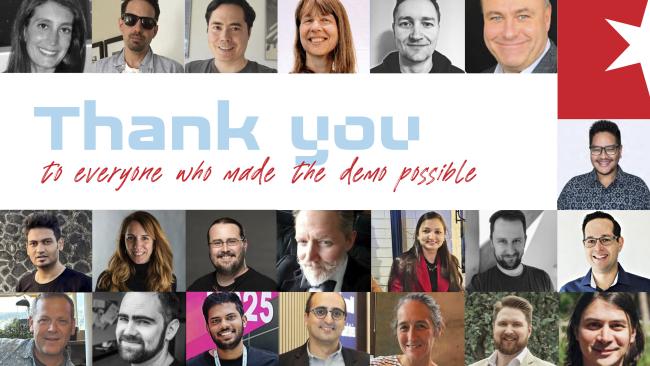
The Voice of the Driesnote Demos
For a couple of years now, I’ve been fortunate to help produce the demo videos in Driesnote presentations, often one of the more anticipated parts of each DrupalCon. Sometimes people assume that because they can hear my voice, I am responsible for the compelling story these videos tell. That’s flattering, but the truth is that each time there is a team of people whose combined efforts come together to produce what can be seen in the videos.
People do often compliment the voice component specifically, and (being Canadian and all) I feel compelled to share that I do have some technical help in that area as well. The truth is that the setup I use isn’t particularly expensive, though some elements could require some elbow grease, should you choose to follow suit. I’ve been thinking for a while about sharing the details of the setup I use, and a recent long weekend seemed like the perfect opportunity. So if you’ve been wanting to sound your best on a podcast or even a zoom call, here’s the technology that gets me compliments.
The Microphone
When COVID hit, I was one of the many who scoured online retailers for a decent microphone that wouldn’t break the bank. What I bought delivered on half of that, being affordable but not really anything to write home about acoustically.
Years later, I came across a YouTube review of a Fifine XLR/USB Podcast Microphone. The reviewer noted that although it was pretty “mid” (as the kids say) as a USB microphone, it was comparable to significantly more expensive microphones over an XLR connection. You son-of-a-you-know-what, I was in.
The Audio Mixer (USB Interface)
Of course, the downside of an XLR connection is the need for an additional piece of hardware, to connect to your computer. At first I ordered a Fifine USB interface, but I didn’t really like the way it worked, so I returned it and got a Vocaster One instead. And of course I needed an XLR cable, but I got an inexpensive Amazon Basics version which I still use today.
The setup was pretty straightforward. XLR cable into mic, cable into USB interface. USB cable into computer. Vocaster has its own Vocaster Hub software, with options to customize to your heart’s content, if that’s a rabbit hole you want to venture down. I dialed in the mic level to something that didn’t blow out the top end for my voice, then turned on the “Enhance” function and selected the “radio” preset, and I haven’t touched it in two years since then.
A Mic Arm (optional)
I like to keep my desk as uncluttered as possible, so an arm that keeps the mic of my desk is ideal. More importantly, you get much better fidelity out of any microphone if you can keep it physically close to your mouth (apparently the conventional wisdom is “a fist away” lol). Why is that important? A few reasons.
Having your mouth closer means that the signal doesn’t need to be boosted as much. That means less echo, less ambient noise or hiss, and so on.
Having the mic closer also means that you can speak more naturally, with less effort. That, along with the sheer physical proximity will give your voice a fuller, warmer, and “broadcast” tone thanks to the proximity effect.
I went with the Elgato Wave Mic Arm, but you may be able to find something cheaper that meets your particular needs.
Potential Cheat Code: Vocaster One Studio
In the course of writing this post, I thought it would be interesting to compare what I paid for the mic, the mixer, and the arm, and compare current prices to what I paid. Surprisingly, the mic is currently much less than what I paid, the mixer is more, and the arm is a little less. So if you wanted to reproduce my setup, you could do it for around the same price, two years later. I suspect the specific prices will also vary pretty widely based on where you are.
As I was clicking around, I did also notice that Bezos & Friends currently offers a Vocaster One Studio package that includes a microphone, mixer, XLR cable, closed-back studio headphones, and a tripod mount for the mic. At a price point that is about half of what the mixer alone currently lists for. IMHO you’d be crazy not to start here, and upgrade individual pieces as you see fit.
Make a Connection
Anyone who saw the Talking Drupal podcast live from Chicago can attest to the importance of a reliable connection. In that instance, the hotel WiFi failed me (on multiple occasions). At home, I have the most robust internet connection available from my ISP. I also make a point to use a wired connection from my laptop to my cable modem. The idea is to remove as many points of failure as possible.
There was also a time I wouldn’t rely on Bluetooth headphones, since I once had a pair of earbuds that sounded great but failed me 45 minutes into a customer call, and it was awkward to switch when it happened. More recently, however, I tend to use wireless over ear headphones, especially at home. They sound and feel great, and typically sport a battery life that would last more than a day.
So in that specific example I have chosen convenience over maximum dependability. Think through all the different connections you need for your own setup, and decide where you need dependability or you can opt for something more convenient. You may find that some of these choices change over time.
Audacity - Processing the Audio
For the demo videos in the DrupalCon Chicago 2026 Driesnote, I decided to upgrade the audio as much as I could. Previously I had just been using Quicktime Player (which is free on macOS computers) to record the audio. That worked, but only gave me very basic options for editing.
After looking at a few options, I decided to use Audacity. For editing alone it’s a significant upgrade (in addition to also being free), and it has a variety of tools to manipulate and optimize your audio. After watching a few videos to get myself up to speed, I decided to follow the recommended “5 EASY steps” in this video. I thought it appreciably improved the final voiceovers for the Driesnote demo videos.
Some people similarly use OBS to provide more processing options on Zoom calls, but I haven’t personally found that to be necessary.
Don’t Spend More Than You Need To
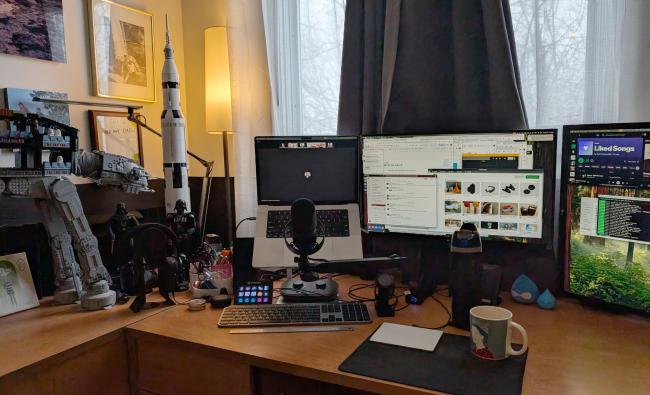
Hopefully by now, you have the sense that I don’t think there’s a direct line between how much you spend on your gear and how good you sound. There are lots of choices you can make without emptying your bank account, that will give you a professional sound. Here’s a peek at my current setup:
That said, the technology is only part of sounding great. To really sound your best, there are some ways you can upgrade your physical space, which I’ll dive into in my next post.
Comments